
craving restaurant-quality chicken katsu? this guide reveals the secrets that pro chefs use to achieve the ideal crispy crust and juicy interior. we’ll go deep on technique, avoid common mistakes, and give you the exact tips that make all the difference.
What really makes chicken katsu special?
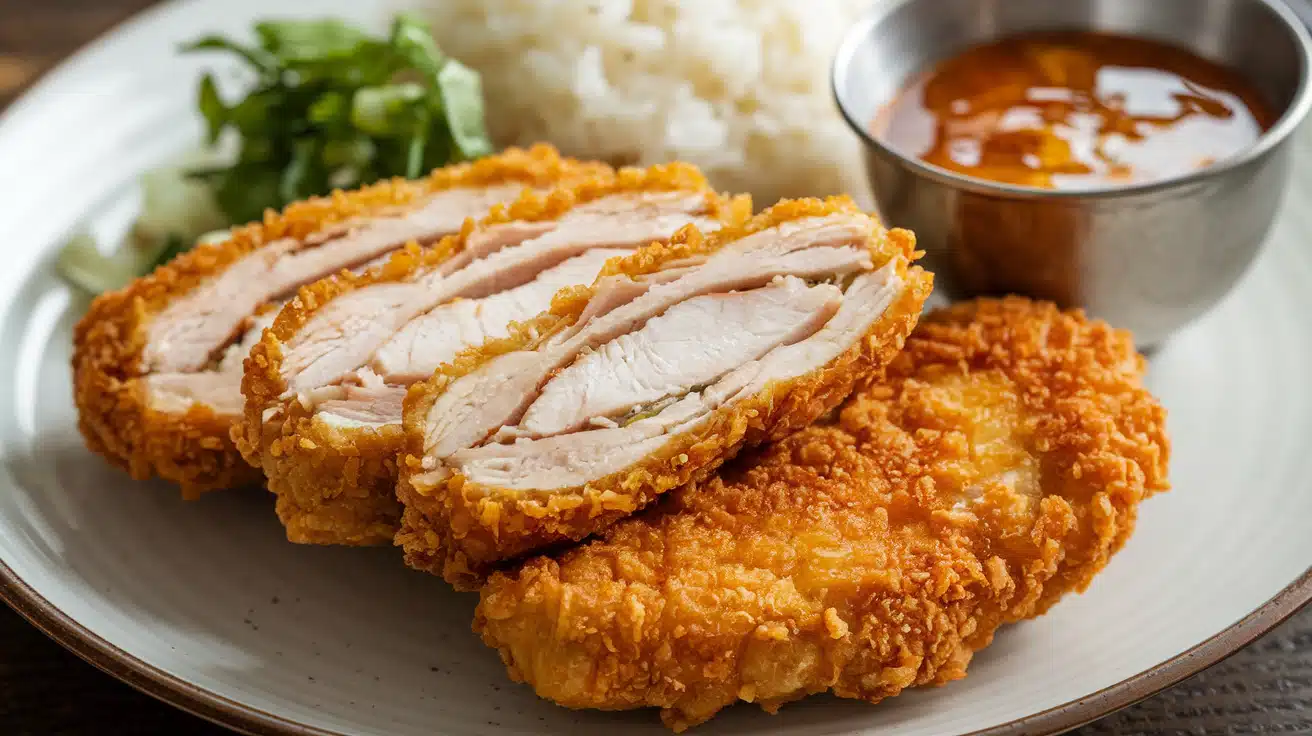
chicken katsu is more than a fried cutlet. its roots in japanese fusion cuisine marry western technique (breaded and fried) with japanese dedication to detail. the goal is perfection: thin, evenly coated, and fried to the golden-crisp crunch that makes you wonder how it’s even possible to get it this good. unlike other fried foods, katsu isn’t greasy, but light and addictive.

the best ingredients (and why they matter)
chicken: quality first
- cut: boneless, skinless chicken breasts—ideally fresh, not frozen. fresh chicken has a firmness and juiciness that’s hard to get from frozen.
- size: around 6-8 ounces per breast for uniform cooking.
- preparation: trim off any fatty or tough bits and butterfly the chicken for even thickness.
pro tip: organic or free-range chickens yield more tender meat with a deeper flavor, which stands out in the final result.
the breading: layers that stick (literally)
here’s the inside scoop: the classic breading setup uses flour, egg, and panko, but pros treat each layer like a step in a ritual.
- flour: coat lightly but fully, tapping off any excess—this layer locks in moisture and sets the foundation for a crispy exterior.
- egg wash: whisk eggs with a splash of milk for smooth coating. this layer bonds the flour and panko together like glue.
- panko breadcrumbs: go for authentic japanese panko—it’s light, airy, and designed to produce that signature crunch. you can make it even crispier by lightly toasting the panko before use.
season each layer! salt and pepper should be added to the flour and egg wash, and you can even add a bit of garlic powder to the panko.

the oil: precision makes perfect
neutral, high-smoke-point oil like canola or vegetable oil is essential. never reuse old oil for katsu—it’ll ruin the clean, light flavor.
tonkatsu sauce: the secret blend
many rely on store-bought sauce, but making your own takes the dish up a notch. combine worcestershire, soy sauce, mirin, sugar, and a hint of grated ginger. this blend has complexity, and it elevates the flavor of each bite.
pro methods: how to nail every step
prepping the chicken for max tenderness
take chicken out of the fridge 30 minutes before cooking. butterfly each breast to 1/2 inch thickness, and use a meat mallet if needed to even out the thickness across the cutlet. this ensures it cooks evenly, giving you juicy, tender chicken without overcooking.
tip: don’t skip seasoning the chicken directly with salt and pepper after pounding. let it rest for about 10 minutes to absorb the flavors before breading.
building a breading station like a pro
set up three shallow dishes for flour, egg wash, and panko. here’s the trick that chefs use: organize it like an assembly line, so the chicken moves fluidly from one stage to the next without hesitation. any delay, and you risk soggy or uneven coating.
frying techniques that guarantee perfect crunch
temperature control: the silent champion
the secret to flawless katsu is temperature consistency. heat oil to exactly 350°f (175°c) and maintain it.
to keep the temp steady:
- don’t crowd the pan. more than two pieces at a time lowers oil temp fast.
- use a thermometer to check the temperature as you go.
- if the oil cools, pause between batches. better to wait a few minutes than fry in lukewarm oil.
pro tip: use enough oil to fully immerse the cutlet (or at least halfway up the side). shallow oil doesn’t work as well for katsu’s signature crunch.
technique:
how to fry like a pro
-
slide each cutlet into the oil away from you to avoid splashes. fry 4-5 minutes per side, flipping only once. look for a golden-brown color; if it’s browning too quickly, lower the heat a bit.
pro move: after frying, place the katsu on a wire rack over paper towels. draining on a rack prevents soggy bottoms.
creative serving ideas (beyond the basics)
the traditional way to enjoy katsu is with shredded cabbage, rice, tonkatsu sauce, and a lemon wedge. but let’s elevate that:
- katsu sando: sandwich the katsu between thick slices of white bread with a layer of sauce for a classic japanese katsu sando (killer on-the-go snack).
- katsu curry: serve with japanese curry and rice for a savory, hearty meal.
- katsudon: lay sliced katsu on rice, top with egg and dashi-soy sauce, and let it all meld together. think of it as the ultimate comfort food.
troubleshooting: when things don’t go as planned
soggy katsu?
check the oil temp—it’s likely too low. or, you could be crowding the pan, causing the temp to drop too much.
uneven cooking?
the chicken might not be pounded to a uniform thickness. make sure each piece is evenly flattened before frying.
coating falling off?
dry the chicken thoroughly before flouring and press the panko in firmly. also, let the coated cutlet rest for five minutes before frying to set the breading.
advanced tips for pros who want to take it further
- double-bread for max crunch: repeat the flour, egg, and panko steps to create a thicker, extra-crispy coating.
- cut against the grain: slicing against the chicken’s grain before serving gives a more tender bite.
- use fresh panko: stale breadcrumbs don’t fry as crisply. fresh panko is always the better choice.

Faqs on chicken katsu
a: absolutely! thighs are juicier but cook differently. make sure they’re deboned and adjust cooking time as they’ll take a bit longer.
a: go for neutral oils like canola, vegetable, or sunflower oil. avoid olive oil, which can overpower the flavor and has a low smoke point.
a: yes, though it won’t be quite as crisp. spray the breaded chicken lightly with oil, then air fry at 370°f for 15-18 minutes, turning once halfway through.
a: commercial tonkatsu sauces often have stabilizers and sweeteners. adjust your homemade sauce by balancing the soy, sugar, and mirin levels.
health-conscious alternatives for chicken katsu
baked katsu
to bake, preheat your oven to 400°f, place the breaded cutlets on a wire rack over a baking sheet, and spray lightly with oil. bake for 25-30 minutes, flipping halfway.
air fryer katsu
air frying can deliver a decent crunch: set the air fryer to 370°f, spray the breaded chicken with oil, and cook for 15-18 minutes, flipping once.
pro tip: air-fried katsu tends to be drier than traditional fried versions, so consider brining the chicken for added moisture.

Equipment
- 🥣 3 shallow dishes
- 🔪 Sharp knife
- 🔥 Large skillet
- 🧹 Paper towels
Ingredients
- For the chicken:
- 4 🐓 boneless skinless chicken breasts, pounded to 1/2-inch thickness
- 1 cup 🌽 all-purpose flour
- 2 🥚 eggs beaten
- 1 cup 🍞 panko breadcrumbs
- ½ tsp 🧂 salt
- ¼ tsp 🌶️ black pepper
- 🛢️ Vegetable oil for frying
Instructions
- Season the chicken breasts with salt and pepper on both sides.
- Set up a breading station with three shallow dishes: one with the flour, one with the beaten eggs, and one with the panko breadcrumbs.
- Dredge the chicken in the flour, dip in the beaten eggs, and then coat thoroughly with the panko breadcrumbs, pressing to help them adhere.
- In a large skillet, heat 1/4 inch of vegetable oil over medium-high heat.
- When the oil is hot, add the breaded chicken breasts and fry for 3-4 minutes per side, until golden brown and cooked through.
- Transfer the fried chicken katsu to a paper towel-lined plate.
- Serve the chicken katsu immediately, with tonkatsu sauce, Japanese mayo, or other desired dipping sauces on the side.
Notes
❓ Can I bake instead of fry? Yes, but the texture won’t be as crispy.
❓ What sides go well with katsu? Rice, shredded cabbage, miso soup.
❓ How to reheat? Bake at 400°F for 10-12 minutes.
Perfect For:
🍽️ Family dinners
🍱 Bento boxes
🍲 Japanese-inspired meals
🍴 Entertaining guests
Nutrition

summary: from home cook to katsu master
perfecting chicken katsu is about attention to detail and practice. from prepping and breading to frying with precision, each step is key. follow these advanced techniques, and you’ll have restaurant-quality katsu that’s crispy, flavorful, and perfectly cooked every time.
related resources
- the ultimate guide to japanese frying techniques
- homemade sauces to elevate any meal
- perfecting the japanese breading station
ready to take your chicken katsu game to the next level? share your results and any tips you discover in the comments below.
