
Key Highlights
Creating delicious hot cross buns at home is a rewarding Easter tradition. This guide simplifies the process, making it easy for anyone to bake these sweet treats.
- Learn a straightforward hot cross buns recipe perfect for beginners.
- Understand the essential ingredients and equipment needed for baking.
- Get a step-by-step guide from preparing the dough to glazing the buns until golden brown.
- Discover tips to ensure your buns are soft, fluffy, and full of flavor.
- Find answers to common questions about this classic Good Friday treat.
- Enjoy your fresh bakes with a warm cup of tea.
What Makes Hot Cross Buns Unique
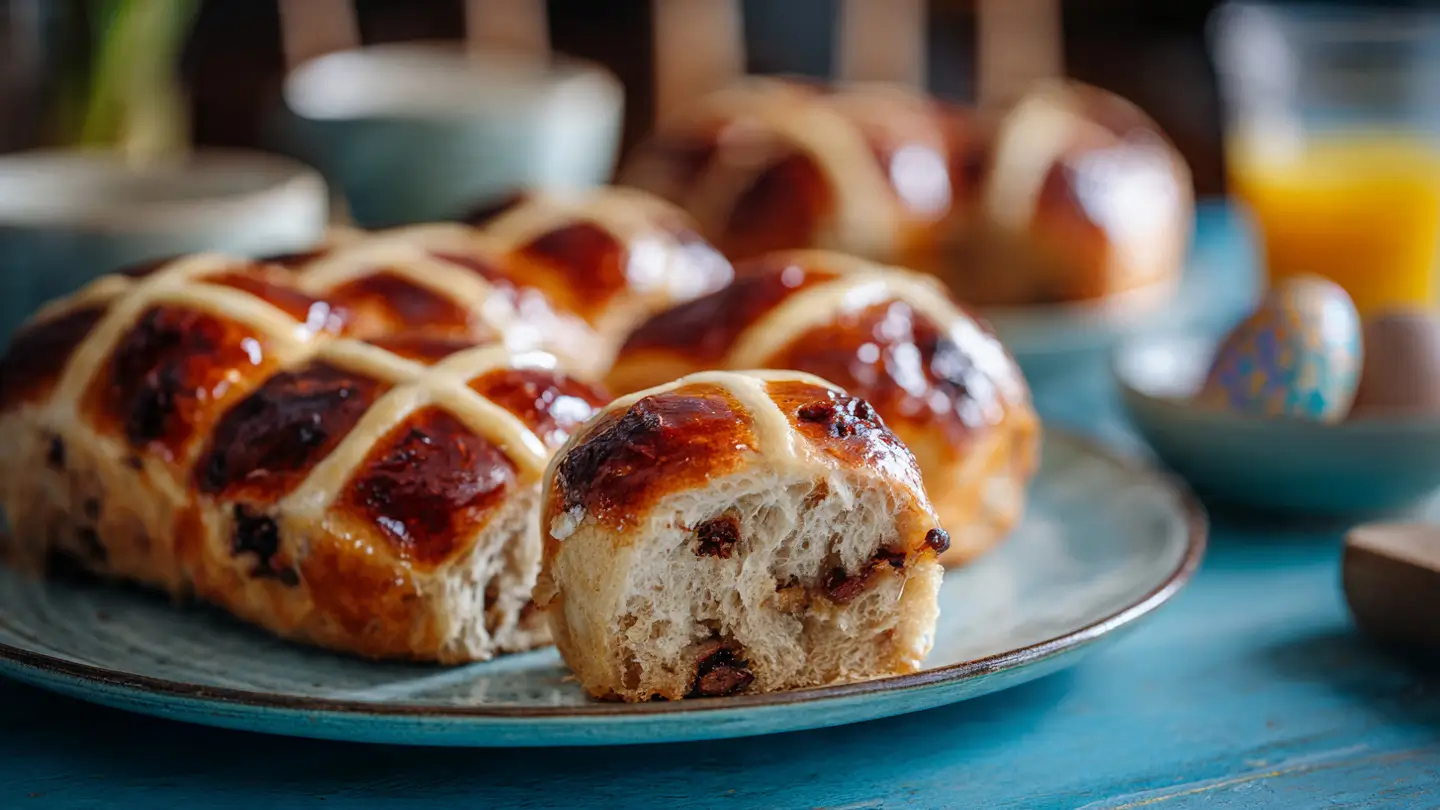
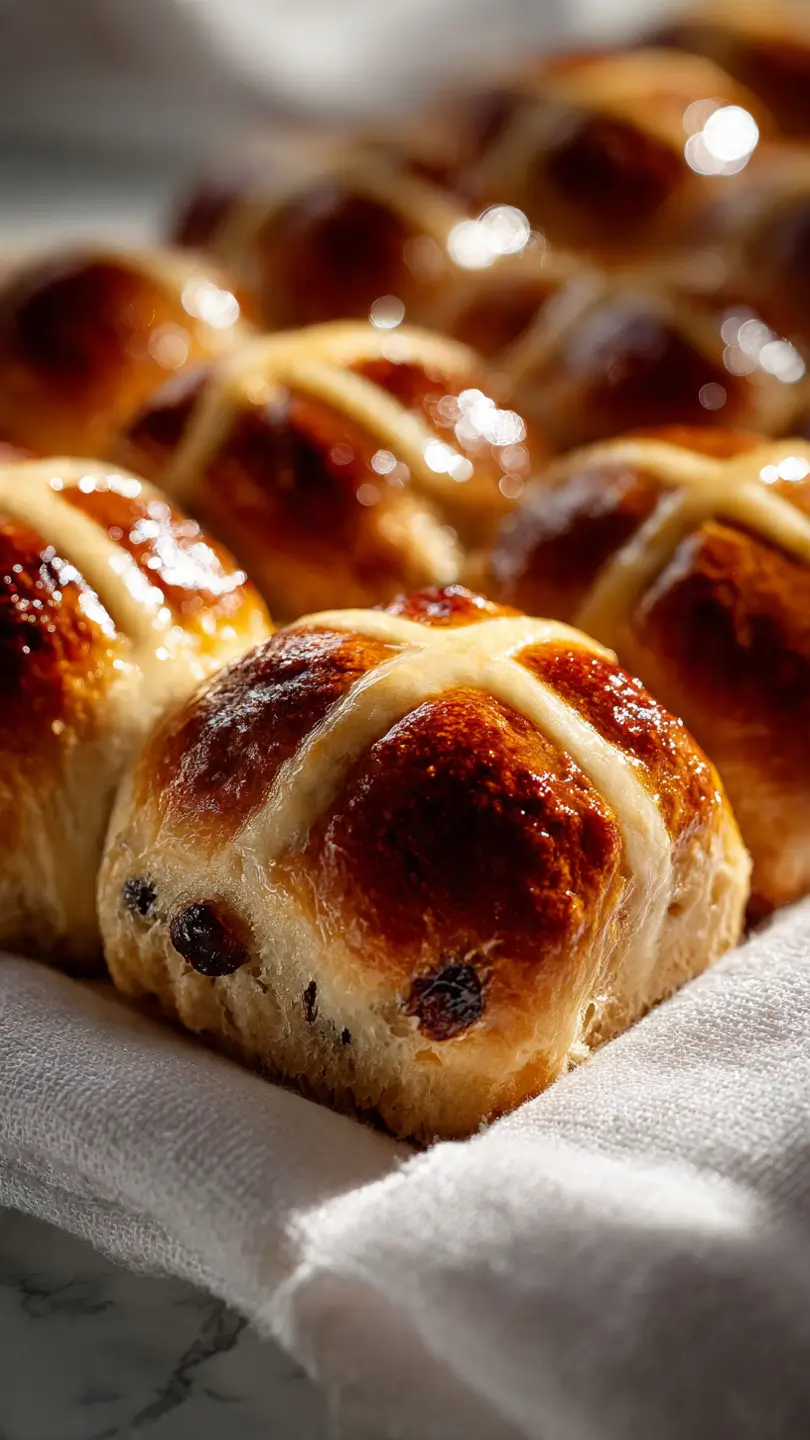
Hot cross buns are a special type of sweet bread known for their unique flavor and appearance. They are a cherished Easter tradition in many parts of the world, especially in England and Guyana. These buns are lightly spiced, filled with dried fruit, and marked with a distinct cross shape on top, which symbolizes the crucifixion and makes them a staple for Good Friday.
The aroma of warm spices like cinnamon and nutmeg filling your kitchen is part of the experience. After baking, the buns are often brushed with a sweet glaze, giving them a beautiful shine. Letting them rise in a warm place is key to their soft, fluffy texture, making them a truly special treat to share with family and friends.
Classic Ingredients Used in Hot Cross Buns
To create a classic hot cross bun, a few key ingredients are essential for both structure and flavor. The base of the dough relies on all-purpose flour, which provides the right texture. Yeast is the leavening agent that helps the buns rise, creating a light and airy consistency. You can use active dry yeast or instant yeast, but make sure it’s fresh for the best results.
Warm milk is used to activate the yeast and add richness to the dough, along with melted butter and eggs, which contribute to a soft, tender crumb. Of course, no hot cross bun is complete without the addition of dried fruits like raisins or currants. These ingredients work together to produce the beloved spiced, sweet bun.
Here are the core components:
- All-purpose flour: Forms the structure of the buns.
- Yeast: Helps the dough rise to become light and fluffy.
- Warm milk and melted butter: Enrich the dough for a soft texture.
- Dried fruits: Add sweetness and a traditional chewy element.
Typical Flavors and Variations
While the classic hot cross bun flavor comes from spices like cinnamon and nutmeg, you can add other ingredients to create exciting variations. Adding citrus zest is a popular choice that brightens the flavor of the soft dough. For example, grating orange zest into the mix provides a fresh, fragrant aroma and taste.
For a final touch, many recipes call for a glaze. An apricot jam glaze, warmed and brushed over the buns, gives a beautiful shine and a hint of fruity sweetness. You can also flavor the glaze itself with a little vanilla extract. These small additions can elevate your bake and help you create the best hot cross buns you’ve ever tasted.
Consider these flavor enhancements:
- Orange zest: Adds a bright, citrusy note.
- Cardamom or cloves: Introduce different warm spice profiles.
- Vanilla extract: Enhances the sweetness in the glaze.
- Apricot jam: Provides a shiny, fruity finish.
- Rum-soaked fruits: Infuses the dough with a rich, deep flavor.
Beginner’s Guide to Baking Hot Cross Buns at Home
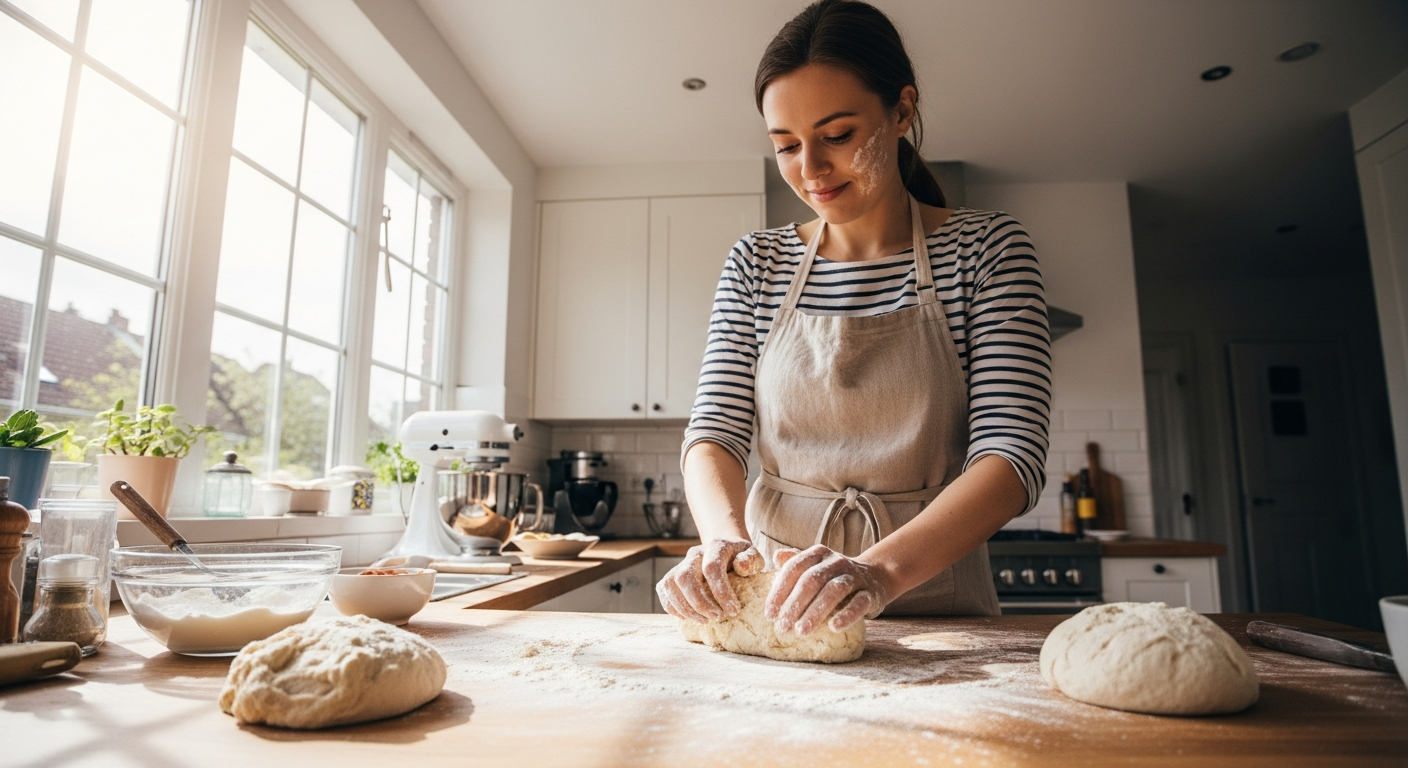
Baking hot cross buns at home might seem challenging, but it’s easier than you think. This guide is designed for beginners, walking you through each step of the hot cross buns recipe. Using a stand mixer can make the process quicker, especially when kneading the dough, but you can also mix by hand.
You will learn how to activate the yeast, mix the dough, and let it rise properly under plastic wrap. From preparing your work surface to shaping the buns, every stage is covered. Soon, you’ll be pulling a tray of perfectly baked buns from your oven. Let’s start by looking at the equipment you’ll need.
Essential Equipment You Need
Having the right tools on hand will make your baking experience smooth and successful. You don’t need a lot of fancy gadgets, but a few key items are crucial for making hot cross buns. A large mixing bowl is necessary for combining your ingredients and for letting the dough rise.
If you have a stand mixer, the dough hook attachment will do the kneading for you. If not, a sturdy wooden spoon and some arm strength will work just fine. You will also need a 9×13-inch baking pan to arrange and bake your buns. For the cross decoration, a piping bag makes application neat and easy, but a simple zip-top bag with the corner snipped off is a great substitute.
Here is the essential equipment list:
- Stand mixer with a dough hook (or a large mixing bowl and wooden spoon)
- 9×13-inch baking pan
- Small bowls for soaking fruit and mixing glaze
- Piping bag or zip-top bag for the cross paste
- Small saucepan for the glaze
Must-Have Ingredients for Beginners
For a successful first attempt at baking hot cross buns, gathering the right ingredients is the first step. This simple recipe uses pantry staples that are easy to find. All-purpose flour is the foundation, providing the structure for your buns. You’ll need active dry yeast or instant yeast to make the dough rise.
Warm milk is crucial for activating the yeast and creating a soft dough. Unsalted butter and an egg enrich the dough, giving it flavor and a tender texture. Don’t forget the sugar for sweetness and the dried fruits, like raisins, for that traditional touch. An extra egg yolk can be part of an egg wash for a golden finish. Keep an eye out for affiliate links if you need to purchase any items online.
Here is a simple list of ingredients for your first batch:
| Ingredient | Role in the Recipe |
|---|---|
| All-Purpose Flour | Provides the main structure for the buns. |
| Active Dry Yeast | Leavens the dough, making it light and fluffy. |
| Warm Milk | Activates the yeast and adds moisture. |
| Granulated Sugar | Sweetens the dough and feeds the yeast. |
| Unsalted Butter | Adds richness and creates a soft texture. |
| Eggs | Binds ingredients and enriches the dough. |
| Dried Fruits | Adds traditional sweetness and texture. |
| Spices (Cinnamon, Nutmeg) | Gives the buns their classic warm flavor. |
Step-by-Step Guide to Making Hot Cross Buns
This bread recipe breaks down the process of making hot cross buns into manageable steps. First, you will prepare the yeast mixture and combine it with the dry ingredients to form a soft dough. Following that, the dough will be kneaded on a floured work surface until it becomes a smooth ball.
Each stage is important for achieving the perfect texture and flavor. From rising to baking, this guide ensures you feel confident throughout the process. Let’s begin with the very first step: preparing the dough.
Step 1: Preparing the Dough
The first step in making hot cross buns is to prepare the dough. This begins with getting your wet and dry ingredients ready. In a small bowl, you’ll soak your dried fruits in hot or boiling water. This simple action plumps them up, making them juicy and flavorful inside the baked buns. After about 10 minutes, you can drain them well and set them aside.
Next, you will create the milk mixture. This involves warming the milk and combining it with sugar and yeast. This mixture is the heart of your dough, as it activates the yeast, which is essential for the dough rise. You will then combine this with the purpose flour and other dry ingredients.
Proper preparation at this stage sets the foundation for a successful bake. Ensuring your ingredients are measured correctly and your yeast is activated will lead to a soft, elastic dough that rises beautifully. This initial phase is crucial for achieving that light, fluffy texture everyone loves.
Step 2: Activating Yeast and Mixing Ingredients
Activating the yeast is a critical step that ensures your buns will rise properly. Whether you’re using active dry yeast or instant yeast, this process, also known as “blooming,” proves the yeast is alive and ready to work. To do this, stir the yeast and a small amount of sugar into warm milk. The milk should be warm to the touch, not hot, ideally between 105-110°F.
Let this yeast mixture sit for about 10 minutes. You’ll know the yeast is active when it becomes very foamy on top. If it doesn’t foam, your yeast may have expired, and it’s best to start over with a fresh packet to avoid dense buns.
Once your yeast is activated, you can proceed with mixing the rest of the ingredients. Add the remaining sugar, melted butter, and an egg to the yeast mixture. Then, add your flour and spices. Mix everything on low speed until the ingredients are just combined before moving on to kneading.
Step 3: Kneading and Proofing the Dough
After mixing, it’s time to knead the dough. If using a stand mixer, use the dough hook and mix on medium-low speed for about 6 minutes. The dough should become elastic and pull away from the sides of the bowl, forming a smooth ball. If kneading by hand, transfer the dough to a lightly floured work surface and knead for about 10 minutes until it’s smooth and elastic.
Next comes the first proofing, or dough rise. Place the dough in a lightly oiled bowl, turning it to coat. Cover the bowl with plastic wrap or a clean tea towel. Let the dough rise in a warm, draft-free spot at room temperature until it has doubled in size. This usually takes about 1 to 1.5 hours.
Finding a warm place is key for an effective rise. You can place the bowl in an oven with just the light on or use a “bread-proof” setting if your oven has one. A proper rise is essential for creating light and fluffy buns.
Step 4: Incorporating Dried Fruits or Substitutes
Once your dough is kneaded, it’s time to add the dried fruits. The traditional choice is raisins or currants, but you have many options. Gently mix the soaked and drained dried fruit into the dough until it is evenly distributed. For extra flavor, you can also add grated orange peel at this stage.
If you or your family are not fans of dried fruit, you can absolutely make hot buns without them or use substitutes. This recipe is versatile, allowing you to customize it to your liking. The buns will still be delicious with just the warm spices.
Consider these alternatives to traditional dried fruits:
- Chocolate chips: A popular choice for a sweeter, more modern twist.
- Chopped nuts: Walnuts or pecans can add a nice crunch.
- Other dried fruits: Chopped apricots, cranberries, or even candied ginger work well.
- Mixed citrus peel: Adds a bright, zesty flavor throughout the buns.
Step 5: Shaping and Arranging the Buns

After the first rise, punch the dough down and transfer it to a lightly floured work surface. Divide the dough into 12 equal pieces. To shape each piece, gather the edges into the center and pinch them together to form a small pouch. This helps create tension on the surface of the dough.
Flip the dough over so the seam is on the bottom. Cup your hand around it and roll it on the work surface in a circular motion. This technique will create tight, smooth dough balls. A smooth surface ensures the buns bake evenly and have a professional appearance.
Arrange the shaped dough balls equally spaced in a greased 9×13-inch baking tray. They will expand during the second rise and baking, so leave a little room between them. Cover the pan and let them rise again until they are nearly doubled in size, which takes about an hour.
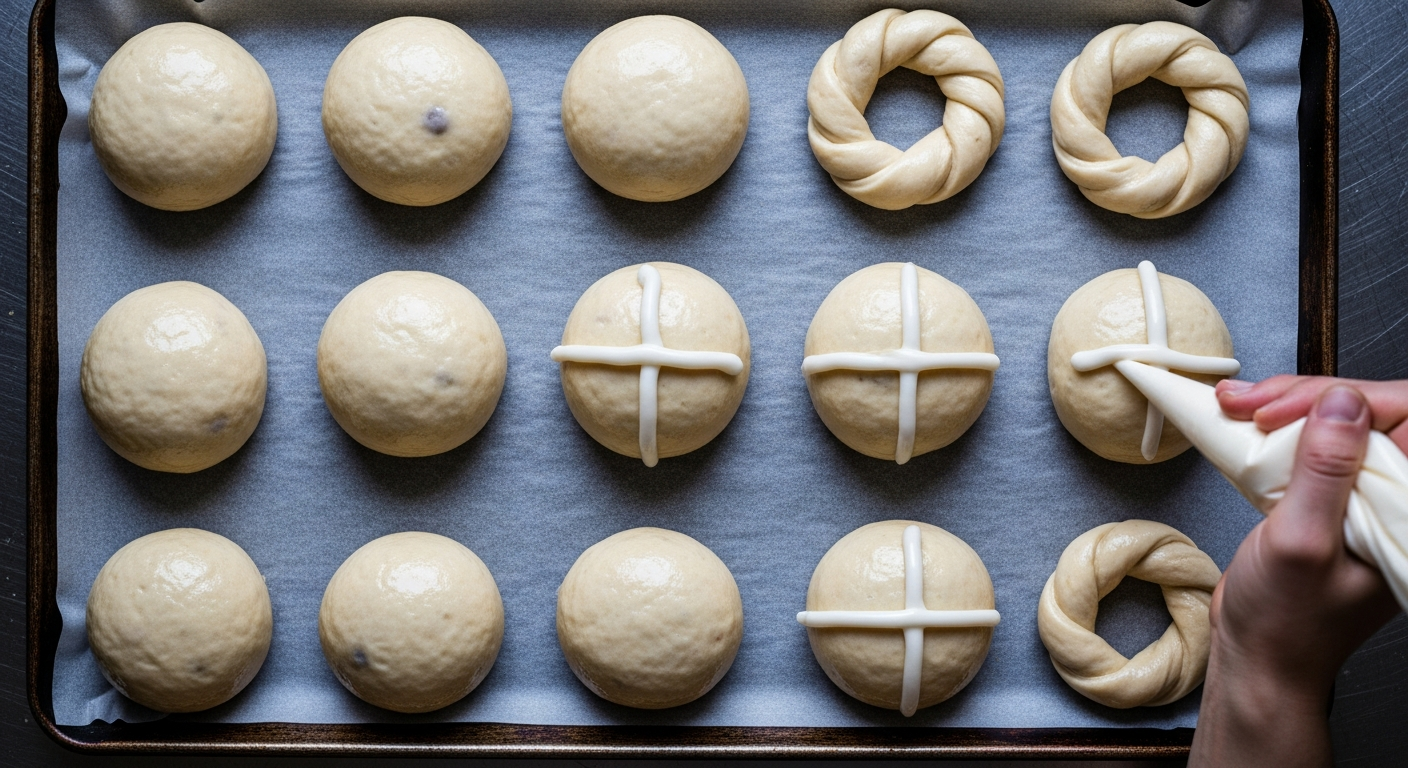
Step 6: Creating the Cross Decoration
The iconic cross on hot cross buns is simple to make. The most traditional method involves a flour paste. This creates a baked-on white cross that provides a slight textural contrast. To make it, you just need to mix flour and water together until you have a thick paste, similar to pancake batter.
Transfer this flour paste into a piping bag or a zip-top bag. If using a zip-top bag, simply snip off one of the corners to create a small opening. Carefully pipe a straight line across the center of each bun. Then, pipe another line perpendicular to the first one to complete the cross shape on top of each bun.
There are other ways to make the cross, but this flour-based method is classic and effective.
- Mix equal parts flour and water to create the paste.
- Transfer the mixture to a piping bag for easy application.
- Pipe one line down the center of each bun.
- Pipe a second line across the first to form the cross shape.
- This is done after the second rise, just before baking.
Step 7: Baking and Glazing for Perfect Finish

Before baking, give your buns a beautiful shine by brushing them with an egg wash. Simply beat an egg with a teaspoon of water or milk and lightly brush it over the tops. This step helps them achieve a lovely golden brown color in the oven. Bake them in a preheated oven at 375°F for about 20 minutes.
Once the buns are baked to a perfect golden brown, it’s time for the final touch: the glaze. While they are still warm, brush them with a sweet glaze. You can make a simple syrup by heating sugar and water in a small saucepan, or use warmed apricot jam for a fruity shine.
This last step not only adds sweetness but also keeps the buns soft and fresh.
- Brush with an egg wash before baking for a golden-brown top.
- Bake in a preheated oven until evenly colored.
- Apply a glaze of simple syrup or warm apricot jam immediately after baking.
Tips for Soft and Fluffy Hot Cross Buns
Achieving a perfectly soft and fluffy texture is the ultimate goal when baking hot cross buns. The key lies in handling the soft dough correctly and ensuring a proper dough rise. Be careful not to add too much flour, as this can make the buns dense and dry. The dough should be slightly tacky to the touch.
Allowing the dough to rise sufficiently in a warm place at room temperature is crucial. Once baked, storing them properly is just as important. Keep leftovers in an airtight container to maintain their softness. Now, let’s explore some best practices to guarantee a great texture.
Best Practices for Texture and Rise
For the best texture, pay close attention to the dough rise. Yeast thrives in a warm, moist environment, so find a warm place for your dough to proof. An oven that is turned off with the light on creates an ideal setting. Covering the bowl with plastic wrap traps heat and moisture, helping the yeast work its magic.
Yes, you can prepare the dough in advance. For an overnight rise, shape the dough balls and place them in the pan. Cover and refrigerate for up to 12 hours. The cold temperature slows down the yeast activity. The next day, let the buns sit at room temperature for about 1.5 hours to warm up and finish rising before baking.
Follow these tips for excellent results:
- Ensure your yeast is fresh and properly activated.
- Avoid adding too much flour; the dough should be soft.
- Let the dough double in size during both rises.
- Choose a warm, draft-free spot for proofing.
- For an overnight method, let the chilled dough come to room temperature before baking.
Common Mistakes to Avoid When Baking
Baking hot cross buns can be very rewarding, but a few common mistakes can lead to disappointing results. One of the biggest errors is adding too much flour. A slightly sticky dough is normal for this recipe. If you add excess flour to combat stickiness, your buns will turn out dry and dense. Trust the process; proper kneading will develop the gluten and make the dough less sticky.
Another mistake is not kneading the dough enough. When using a stand mixer, let it run on low speed until the dough is elastic and makes a “slapping” sound against the sides of the bowl. Under-kneaded dough won’t develop enough gluten, resulting in a poor rise and heavy texture. Also, ensure your yeast is active before you begin.
Here are some pitfalls to watch out for:
- Using expired yeast that doesn’t foam.
- Adding too much flour, resulting in a dense bun.
- Not letting the dough rise for long enough in a warm place.
- Overbaking the buns, which can make them dry.
Ingredients
- Dried Fruit Soak First
- 1 cup 150 g raisins, currants, or mixed dried fruit
- Hot or boiling water to cover (for soaking)
- Dough
- 4 cups 500 g all‑purpose flour
- 2¼ tsp 7 g / 1 packet active dry yeast or instant yeast
- ¼ cup 50 g granulated sugar
- 1 tsp salt
- 1½ tsp ground cinnamon
- ½ tsp ground nutmeg
- ¼ tsp ground allspice or cloves optional
- 1 cup 240 ml warm whole milk (105–110°F / 40–43°C)
- 4 tbsp 60 g unsalted butter, melted and cooled
- 2 large eggs room temperature
- 1 tbsp orange zest optional, for bright citrus note
- 20 –24 whole cloves optional, to press into crosshatch diamonds
- Cross Paste
- ½ cup 60 g all‑purpose flour
- 5 –6 tbsp water add gradually for thick, pipeable paste
- Egg Wash
- 1 egg beaten with 1 tsp milk
- Glaze Choose One
- Option A – Apricot Jam: 3–4 tbsp apricot jam warmed and strained
- Option B – Simple Syrup: 2 tbsp sugar + 2 tbsp water simmered 1–2 minutes
- Optional: ½ tsp vanilla extract added to either glaze
Instructions
- Soak the Dried Fruit
- Place raisins or currants in a small bowl; cover with hot water.
- Soak 10–15 minutes until plumped, then drain well and pat dry. Set aside.
- Activate the Yeast
- In a small bowl, combine warm milk, 1 tsp of the sugar, and yeast.
- Stir gently; let stand 8–10 minutes until foamy and fragrant.
- If no foam forms, yeast is expired — start fresh.
- Mix the Dough
- In a large bowl (or stand mixer bowl), whisk flour, remaining sugar, salt, cinnamon, nutmeg, and allspice.
- Add yeast mixture, melted butter, eggs, and orange zest (if using).
- Mix on low speed with dough hook (or by hand with a wooden spoon) until a shaggy dough forms.
- Increase to medium‑low and knead 6–8 minutes (or 10 minutes by hand on a lightly floured surface) until smooth and elastic.
- Add Dried Fruit
- Gently fold soaked, drained dried fruit into the dough until evenly distributed.
- First Rise
- Shape dough into a ball; place in a lightly oiled bowl; turn to coat.
- Cover with plastic wrap or a clean kitchen towel.
- Let rise in a warm, draft‑free spot 1–1.5 hours until doubled in size.
- Shape the Buns
- Punch down dough; transfer to a lightly floured surface.
- Divide into 12 equal pieces.
- Shape each into a tight ball: gather edges to center, pinch, flip seam‑side down, and roll in a circular motion under a cupped hand.
- Arrange in a greased 9×13‑inch (23×33 cm) baking pan with a little space between each bun.
- Second Rise
- Cover pan loosely with plastic wrap.
- Let rise again 45–60 minutes until nearly doubled and buns are touching or just about to touch.
- If doing an overnight rise: refrigerate covered pan up to 12 hours; bring to room temperature 1–1.5 hours before baking.
- Make the Cross Paste
- In a small bowl, mix flour and water 1 tbsp at a time until a thick, smooth, pipeable paste forms (similar to thick pancake batter).
- Transfer to a piping bag or zip‑lock bag with a small corner snipped off.
- Apply Cross and Egg Wash
- Preheat oven to 375°F (190°C).
- Brush buns gently with egg wash.
- Pipe a line of paste down the center of each row, then pipe lines across to form a cross on every bun.
- If using whole cloves, press one into each diamond of the crosshatch pattern.
- Bake
- Bake 20–22 minutes until golden brown on top and baked through.
- If tops brown too quickly, tent loosely with foil after the first 15 minutes.
- Glaze While Warm
- Immediately after baking, brush warm buns generously with warmed apricot jam (strained) or simple syrup.
- This gives a beautiful, shiny finish and keeps the buns soft.
- Let cool slightly before serving.
Notes
Use a quality 1:1 gluten‑free all‑purpose flour blend with xanthan gum; texture will be slightly different but still soft. Use gluten‑free flour paste for the cross. Bake at 375°F (190°C) for 20–25 minutes
Nutrition

Frequently Asked Questions
Yes, you can definitely make hot cross buns without dried fruits. If you prefer, simply omit them from the recipe. You can also substitute them with other ingredients like chocolate chips or chopped nuts to create your own version of delicious hot cross buns. The spiced dough is flavorful enough to enjoy on its own.
To keep your hot cross buns soft, store them in an airtight container at room temperature. They are best enjoyed within a day or two. If your hot buns become a little dry, you can refresh them by warming them in the microwave for 10-15 seconds before enjoying them with a cup of tea.
The white cross is typically made from a simple flour paste of flour and water. Transfer this paste to a piping bag and pipe the cross shape onto the top of each bun after the second rise and just before baking. This method creates the classic baked-on cross decoration.
Yes, there are gluten-free hot cross bun recipes available. These recipes use a special blend of gluten-free flour instead of traditional all-purpose flour or bread flour. While the texture may be slightly different, you can still bake a delicious batch of gluten-free buns in your baking pan at home.